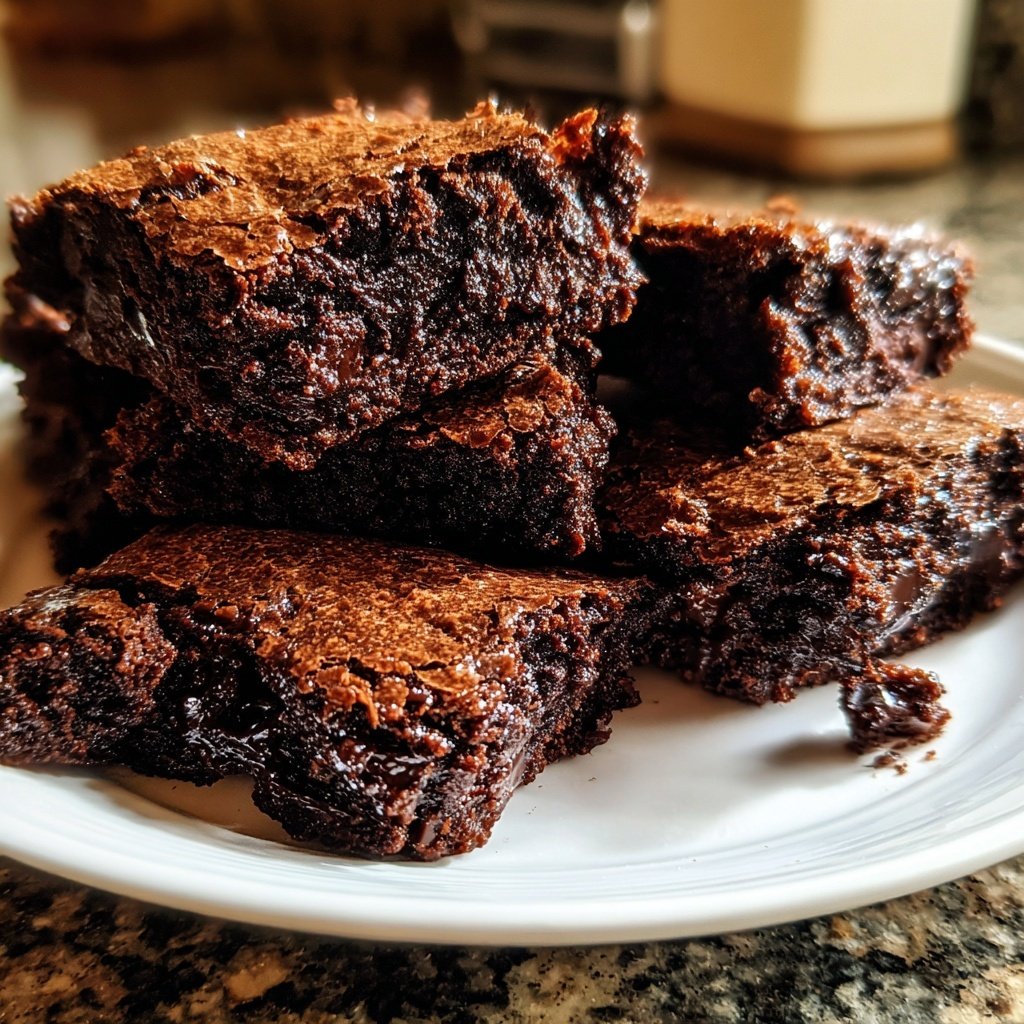
Brownies With Sourdough Starter
Highlighted under: Modern Planning
I love experimenting with different ingredients in my baking, and using sourdough starter for brownies has genuinely transformed my approach. The tangy notes of the sourdough not only enhance the flavor but also give the brownies an incredible texture that's both fudgy and rich. Pairing this unique component with traditional brownie ingredients makes for a delightful treat that is sure to impress. Plus, it’s a fantastic way to use up extra sourdough starter, reducing waste while creating something indulgent.
When I first tried making brownies with sourdough starter, I was amazed at the outcome. The key is allowing the sourdough to ferment slightly before mixing it in with the chocolate batter, which enhances the richness and depth of flavor. I recommend using a well-fed starter for the best results!
One of my favorite tips is to melt the chocolate and butter together until completely smooth, then let it cool slightly before mixing in the eggs. This ensures a perfect texture and prevents the eggs from scrambling. Trying this method has made my brownies a go-to recipe for friends and family!
Why You'll Love These Brownies
- Unique flavor combination that elevates traditional brownies
- Fudgy texture with a slight tang from the sourdough
- Perfect way to use leftover sourdough starter
Understanding the Role of Sourdough Starter
Using sourdough starter in these brownies isn't just a quirky twist; it serves a vital role in the overall texture and flavor profile. The natural fermentation process in the starter introduces a mild tanginess that beautifully complements the sweetness of the sugar and cocoa. This interaction creates a depth of flavor that regular brownies simply can’t achieve. If you're concerned about the sour notes, rest assured they mellow out during baking, leaving a rich, unique taste.
Moreover, incorporating sourdough starter means adding moisture and helping to create that sought-after fudgy texture. The enzymes in the starter also break down gluten, allowing for a more tender crumb. When using active starter, you’ll notice the difference in the resulting bite; it's dense yet soft and provides an exciting new experience when indulging in a brownie.
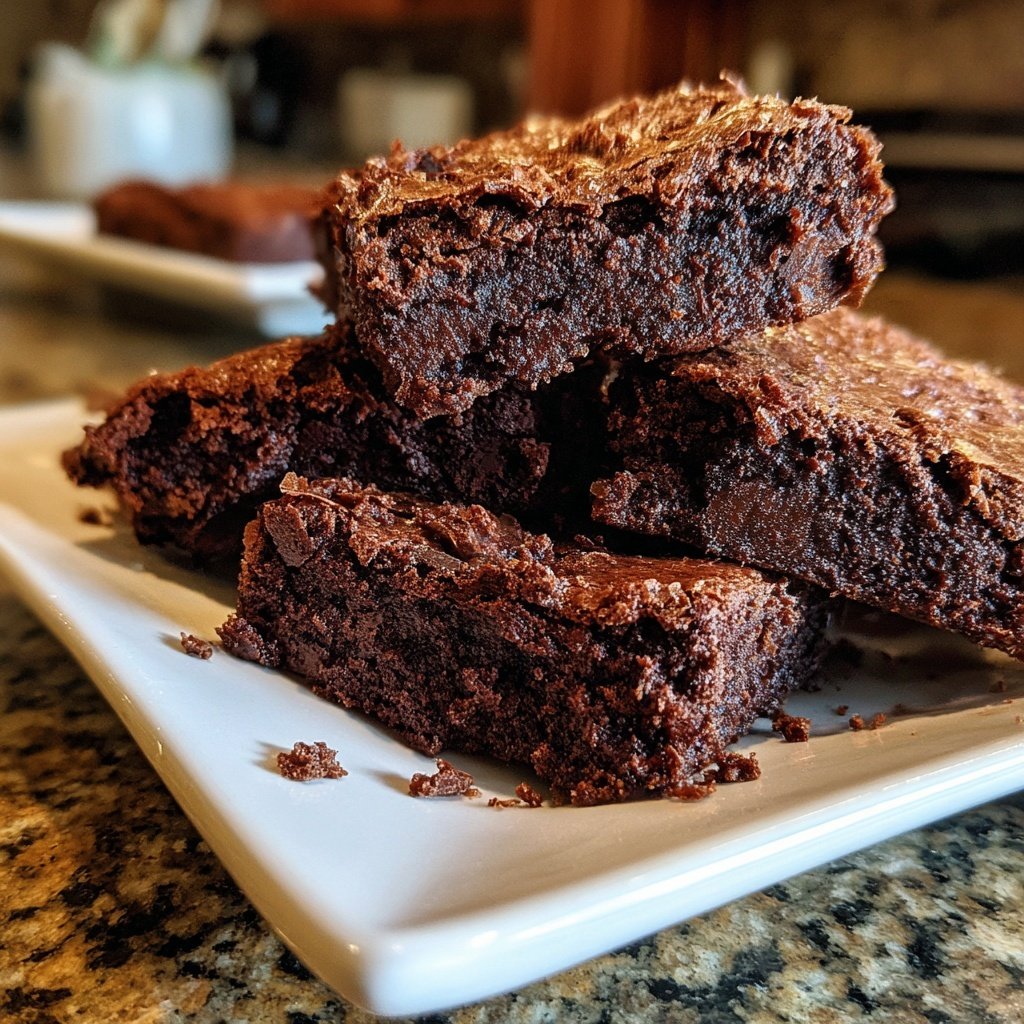
Tips for Perfecting Fudgy Brownies
The key to achieving fudgy brownies lies in your baking time and temperature. Overbaking will lead to dry, crumbly edges, while underbaking can yield a gooey interior that's not quite right. Aim for that perfect balance: bake at 350°F (175°C) for about 30 minutes. Keep an eye out for the edges pulling away from the sides of the pan and a shiny top layer – both are indicators that your brownies are ready to come out.
Also, remember to let your brownies cool completely before cutting into squares. This allows the fudginess to fully set, creating the ideal texture when you slice them. Using a plastic knife or a sharp, non-serrated knife will help you get clean edges. I like to let them cool in the pan, which not only reduces mess but also allows the residual heat to finish cooking the center.
Serving and Storing Your Brownies
These brownies offer endless serving possibilities! Enjoy them warm with a scoop of vanilla ice cream for a delightful dessert. You can also top them with whipped cream or a drizzle of caramel for extra indulgence. If you want to elevate your presentation, sprinkle sea salt on top right before serving to enhance the chocolate flavors.
If you find yourself with leftovers, store them in an airtight container at room temperature for up to four days, or in the fridge for about a week. They can also be frozen for up to three months – simply wrap them tightly in plastic wrap and then foil. When you're ready to indulge again, allow them to thaw at room temperature. You can even reheat them in the microwave for a few seconds for that freshly-baked taste.
Ingredients
Gather the following ingredients to create these delicious brownies:
Brownie Ingredients
- 1 cup unsweetened cocoa powder
- 1 cup unsalted butter
- 2 cups granulated sugar
- 1 cup sourdough starter (active)
- 4 large eggs
- 1 teaspoon vanilla extract
- 1 cup all-purpose flour
- 1/2 teaspoon salt
- 1 cup chocolate chips (optional)
Now that you have all your ingredients ready, let's move on to the next steps.
Instructions
Follow these simple steps to whip up your brownies:
Preheat the Oven
Preheat your oven to 350°F (175°C) and grease a 9x13 inch baking pan.
Melt the Butter and Chocolate
In a medium saucepan, melt together the butter and cocoa powder over low heat until smooth. Remove from heat and let cool slightly.
Mix in Sourdough and Sugar
Once the chocolate mixture cools, stir in the granulated sugar and sourdough starter until well combined.
Add Eggs and Vanilla
Add the eggs one at a time, mixing well after each addition, then stir in the vanilla extract.
Combine Dry Ingredients
In a separate bowl, whisk together the flour and salt. Gradually add the dry ingredients to the wet mixture, stirring gently until just combined.
Fold in Chocolate Chips
If desired, fold in chocolate chips for added richness.
Bake the Brownies
Pour the batter into the prepared pan and spread evenly. Bake in the preheated oven for 30 minutes or until a toothpick inserted comes out with a few moist crumbs.
Cool and Serve
Allow the brownies to cool in the pan before slicing into squares. Enjoy your creative and delicious treat!
Once you've followed these steps, your brownies will be ready to indulge in!
Pro Tips
- For an extra dimension of flavor, consider adding a pinch of espresso powder when mixing in the dry ingredients. It enhances the chocolate flavor beautifully without adding any coffee taste.
Ingredient Substitutions
If you’re out of unsalted butter, you can substitute with an equal amount of coconut oil or a plant-based butter for a dairy-free version. This swap retains the fat content needed for a fudgy texture while giving a subtle flavor twist. Additionally, if you want to make these brownies gluten-free, substitute the all-purpose flour with a 1:1 gluten-free baking blend. Just be cautious with your mixing method, as gluten-free flours can absorb more liquid.
For those looking to cut down on sugar, you can try replacing half of the granulated sugar with a natural sweetener like maple syrup or agave nectar. Just be aware that this may affect the brownie’s texture, so consider adding a little extra flour to balance out the moisture.
Troubleshooting Common Issues
If your brownies turn out too cake-like, it may be due to overmixing after adding the dry ingredients; you want to mix until just combined. Another common issue is the brownies being too dense. If this happens, it could be due to using too much sourdough starter or not baking them long enough. Always measure accurately and use a toothpick to check for doneness.
In some cases, brownies might come out oily if melted butter is incorporated while too hot, causing the fat to separate. Ensure the butter-cocoa mixture cools down sufficiently before adding the sugars, as this prevents an oily end product and keeps the batter cohesive.
Variations to Try
Feel free to experiment by adding a sprinkle of chopped nuts such as walnuts or pecans to add a delightful crunch and enhance the nutty flavors from the sourdough. For a seasonal twist, fold in some pumpkin puree and spices like cinnamon and nutmeg for a fall-inspired treat that still delivers that rich brownie experience.
You can also play around with the type of chocolate chips you use. Dark chocolate chips will give a more intense chocolate flavor, while milk chocolate chips provide a sweeter contrast. For an extra layer of flavor, consider adding a tablespoon of espresso powder to boost the chocolate taste and introduce a rich undertone.
Questions About Recipes
→ Can I use a different type of flour?
Yes, you can substitute with whole wheat flour; however, it may slightly change the texture and flavor.
→ What if I don’t have sourdough starter?
You can omit it and add an extra egg and a tablespoon of yogurt or buttermilk for a similar moisture effect.
→ How should I store these brownies?
Store them in an airtight container at room temperature for up to a week, or refrigerate for longer freshness.
→ Can I freeze these brownies?
Absolutely! Cut them into squares and freeze in an airtight container for up to three months.
Brownies With Sourdough Starter
Created by: Briar Kensington
Recipe Type: Modern Planning
Skill Level: Intermediate
Final Quantity: 12 brownies
What You'll Need
Brownie Ingredients
- 1 cup unsweetened cocoa powder
- 1 cup unsalted butter
- 2 cups granulated sugar
- 1 cup sourdough starter (active)
- 4 large eggs
- 1 teaspoon vanilla extract
- 1 cup all-purpose flour
- 1/2 teaspoon salt
- 1 cup chocolate chips (optional)
How-To Steps
Preheat your oven to 350°F (175°C) and grease a 9x13 inch baking pan.
In a medium saucepan, melt together the butter and cocoa powder over low heat until smooth. Remove from heat and let cool slightly.
Once the chocolate mixture cools, stir in the granulated sugar and sourdough starter until well combined.
Add the eggs one at a time, mixing well after each addition, then stir in the vanilla extract.
In a separate bowl, whisk together the flour and salt. Gradually add the dry ingredients to the wet mixture, stirring gently until just combined.
If desired, fold in chocolate chips for added richness.
Pour the batter into the prepared pan and spread evenly. Bake in the preheated oven for 30 minutes or until a toothpick inserted comes out with a few moist crumbs.
Allow the brownies to cool in the pan before slicing into squares. Enjoy your creative and delicious treat!
Extra Tips
- For an extra dimension of flavor, consider adding a pinch of espresso powder when mixing in the dry ingredients. It enhances the chocolate flavor beautifully without adding any coffee taste.
Nutritional Breakdown (Per Serving)
- Calories: 250 kcal
- Total Fat: 13g
- Saturated Fat: 8g
- Cholesterol: 105mg
- Sodium: 60mg
- Total Carbohydrates: 34g
- Dietary Fiber: 2g
- Sugars: 25g
- Protein: 3g